
As a photographer I love,absolutely love natural lighting.If there is any way what so ever I can shoot a photograph with natural lighting I am going in that direction.Now I strobe and flashes kind of stuffs but I love natural lightning in some times that can get me into trouble as in this case.I need to correct this image.So I am thinking I am going for the neutral tone as the one click solution.
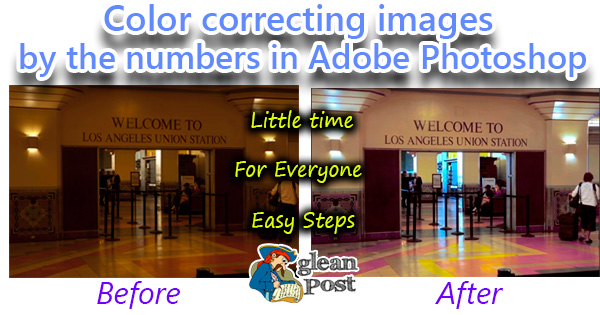
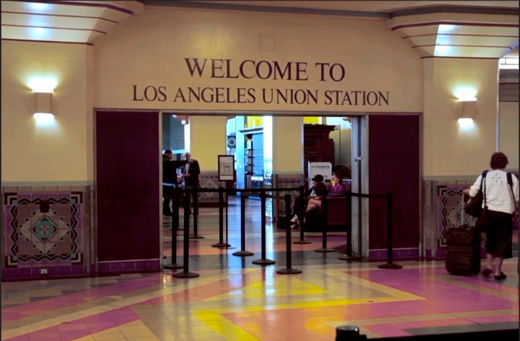
Our Source Image:

Step 1:
Import image into Adobe PhotoshopStep 2:
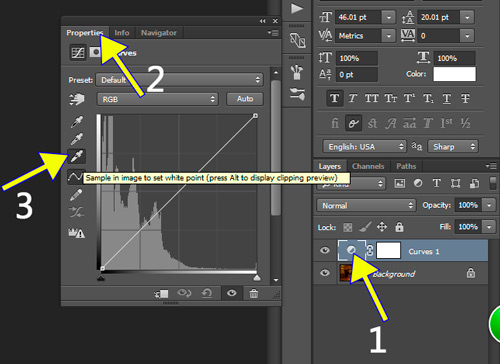
go to adjustment >curves.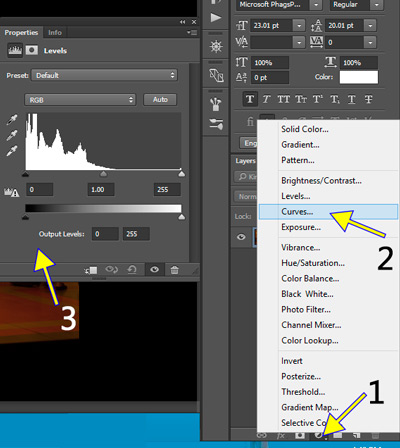
Step 3:
Now we have to select neutral tone from the image.For that I select eyedropper tool,and change the sample size for 3by3 Average.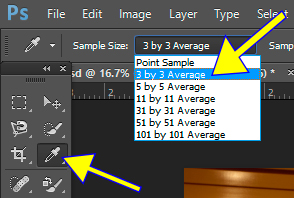
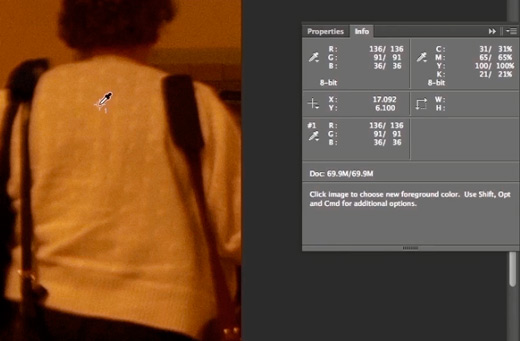
Then select middle tone by eyedropper.In here we select lighter area from woman's dress.Remember when you click on the image press Shift key with eyedropper.Then you can see info pallet automatically popup.
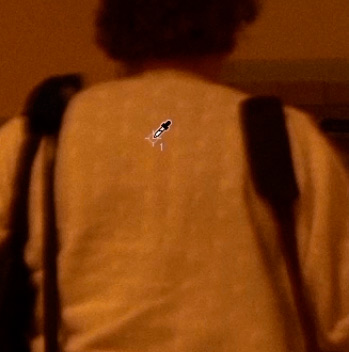
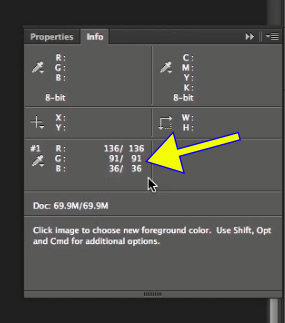
Open up the info pallet.You now have the color samples right here.You can more than one.These numbers are Red,Green and Blu e represents what we clicked on the image.So we have a sample what would like to be more than white.
Step 4:
Add those 3 numbers together
136+91+36=2063
Step 5:
Since we dealing with 3 color channels,divide that by 3.
2063/3=87.6
If it is a barber point five round up,if it is below round down.So we got the number 88.
Step 6:
go back to properties on our Curves adjustments.Double click on white eyedropper
Step 7:
Once you double click on eyedropper.You will see this dialog box.Now You have to change 255 values to another value.The Problem is what is another value?Hope you can remember our previous value.
Subtract that value(88) from 255.
255-88=166
I come up with 166.

Step 8:
change above all three values by 166.
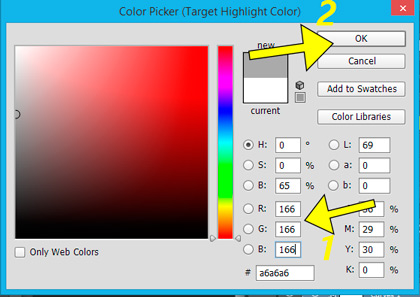
And hit OK.Now will ask you if you want to make this default in most cases you probably are going to this use more than once.You might.but if you don't say NO.we can use it once.

Step 9:
For the next step basically to click now inside that area with an eyedropper.So we right back into our target.
Incidentally.If you following along with me.You might have got nice output.....
It's not too bad....huh.....
Please comment and share......


![[PROBLEM SOLVED] How to connect i7S TWS airpods and pair](https://blogger.googleusercontent.com/img/b/R29vZ2xl/AVvXsEhpElfEw68GIV4Btl_ukHD_mzbfAdFh4hiutnxqL0y4uQe_1Gmdl05NR0C0ayLgRgTvfcw6uppkPKfZnXrE02bUDJWkN3H2Dz-1bCF4BuSVUimS63WoRJ-PFFKMGNQFVSbBn541c4ak3vc/w74-h74-p-k-no-nu/How-to-connect-i7S-TWS-airpods-and-pair-%255BPROBLEM-SOLVED%255D.jpg)
You should not lose focus on the main purpose of outsourcing the photo editing in the first place. You want to have exceptional, consistent looking images as an end product.
ReplyDeletePhoto Retouching Services